Awesome Expression > Sims 1 > Sims 1 Tutorials > Custom Animation Tutorial - Part 1
Sims 1 Custom Animation Tutorial - Part 1 |

What are Sims without animations? They will just sit there doing nothing… wait! Sitting is an animation too!
Nothing excites me more than new animations for The Sims. For the longest time, I admire the few Sim animators who cracked the mystery of animation. I still do, but now I can do the same, and you can too! It is actually much easier than you would think, and loads of fun. In fact, I think this was THE most enjoyable learning curve in my Simming. So what are we waiting for?! CAMERA!!
Nothing excites me more than new animations for The Sims. For the longest time, I admire the few Sim animators who cracked the mystery of animation. I still do, but now I can do the same, and you can too! It is actually much easier than you would think, and loads of fun. In fact, I think this was THE most enjoyable learning curve in my Simming. So what are we waiting for?! CAMERA!!
Programs for download:
Overall workflow
1. Make new Sim poses in Simpose (aka Simposium).
2. Make a new animation with the poses in Simpose.
3. Clone object with Transmogrifier (Tmog).
4. Optional: Edit object appearance (sprites) with a graphics editing program (eg, Photoshop, Paint, GIMP)
5. Link your object to the new animation with iff Pencil2.
Making new poses
You will need the Simpose program for this. Download above.
Poses are static states of a Sim. Eg, standing, standing with 1 hand up, sitting, sitting back.
A project (collection) of static poses in Simpose is called a pose library. You can’t save a pose without saving it to a pose library. Each static pose will become a keyframe for an animation sequence. I usually do 4-8 for my Sims 1 animations. The Default pose is a straight standing position.
Good to Know: The beauty of Simpose is that it moves the body joints from pose to pose in an animation. It is different from old-school hand-drawn animation with pages and pages of intermediate frames. This means you only need to make “end poses” while Simpose does the heavy lifting. For example, if you want your Sim to lift the right hand all the way up and then all the way down, you only need the default pose and 1 new pose with the right hand completely up. No need to make half-way up (unless you want it to pause half-way). Awesome!
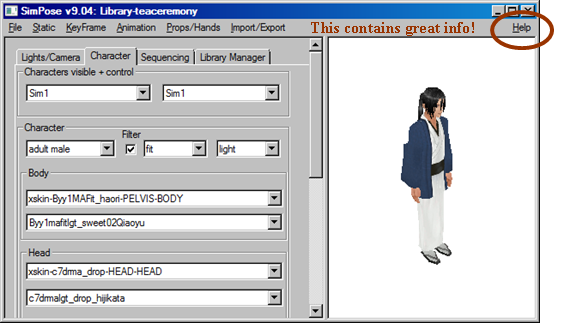
1. Start Simpose. Notice the tiny “help” at the top right? Click on this! It contains invaluable info!
2. You
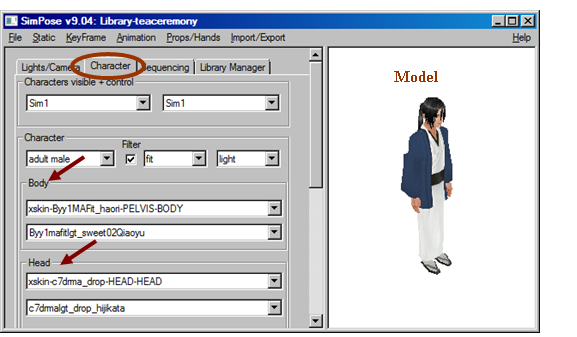
need a model for your poses. Under Character tab > select a
body and head as animation model. Simpose has its own skin folders
(it doesn’t automatically link to the Sims game skin folder). You
can add your favorite skins to the respective Simpose folder.
*The choice of model just allows you to view poses/animation in Simpose. It does not tie the model skin to the pose in the game.
*Useful shortcuts to control the model:
*The choice of model just allows you to view poses/animation in Simpose. It does not tie the model skin to the pose in the game.
*Useful shortcuts to control the model:
- Mouse drag = move model up or down
- Shift + mouse drag = zoom in or out
- Ctrl + mouse drag = view angle change
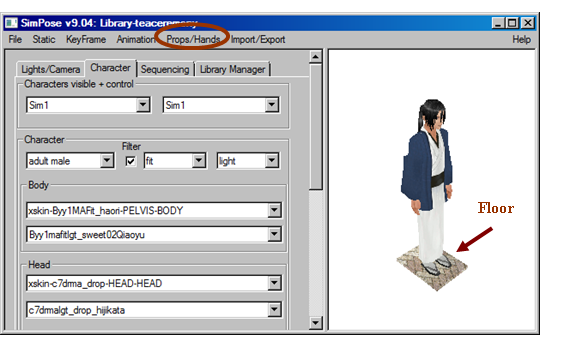
3. Optional: Under Props/Hands > Add props > Floor. This adds a tile below your model as a useful spatial reference.
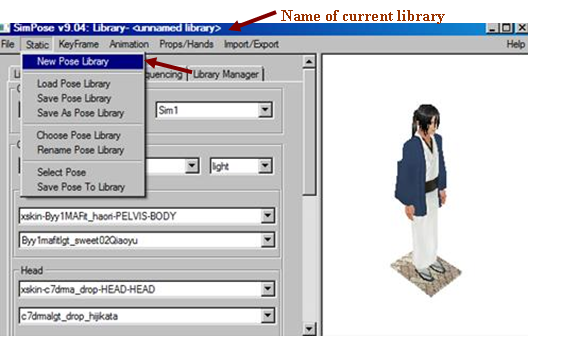
4. Now start a pose library. Under Static > New pose library (type in a name) OR Load/choose pose library to load a previous one.
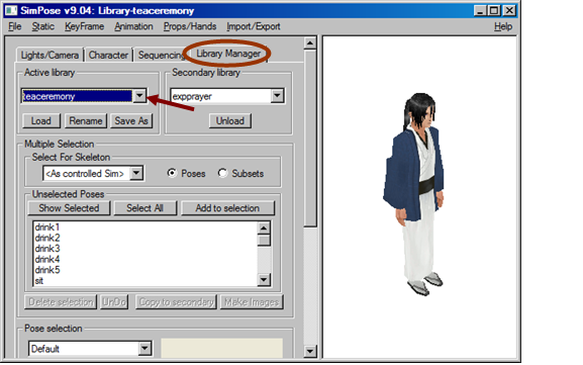
* The Library Manager tab is useful but confusing. Sometimes when I had trouble loading a pose library, I go to Library Manager and load it there. Click on “active
library” > select library > click Load.

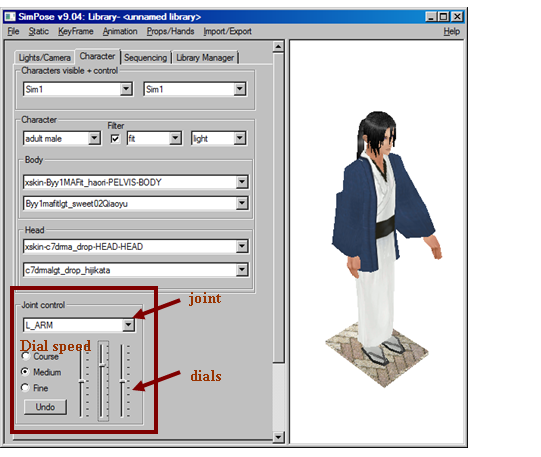
5. Now the fun begins! Make a new pose using the joint control under the Character tab. This works like a mannequin. You can move different joints in the same pose!
- Choose from the drop menu which joint you want to move.
- Then use the 3 dial bars for movement. They each move the given joint differently. You can choose between fine, medium, or coarse depending on how much you want to move the joint. Click on undo to go back to default for that joint. To quickly reset the dials back to 0, just click on another dial speed (eg, fine).
- Lift an arm, tilt the spine, be creative!
- The “Root/pelvis translate” controls Sim movement across space. Eg, floating in the air, moving forward 1 tile. That is why it is good to have a floor tile.
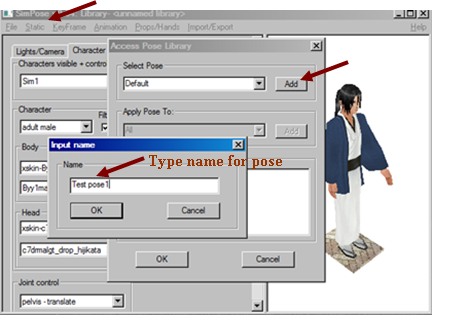
6. Static > save pose to library > add > type new name
*Do not save over default (keep as a useful reference)!
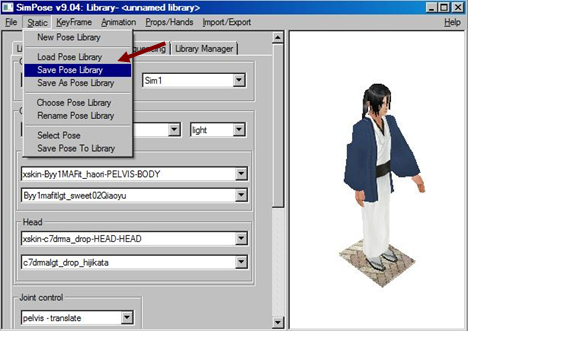
7. Static > save pose library (IMPORTANT! Or you will lose the saved pose!) A pose library is a .psl file.
8. Repeat to make and save a few poses.
9. Be paranoid! Save the pose library again!
9. Be paranoid! Save the pose library again!
This is the end of Part 1. I hope you had fun making lots of cool poses!
Part 2 will go through how to make the actual animation!
Part 2 will go through how to make the actual animation!

