Awesome Expression > Sims 1 > Sims 1 Tutorials > Cloning an Object in Transmogrifier Tutorial
Cloning an Object in Transmogrifier for Sims 1 Tutorial
|
|
Download a copy of Transmogrifier here:
|
| ||||||
Transmogrifier (Tmog) is the key program for making custom objects. It can clone a copy of an existing Sims 1 object (called a base) for customization (eg, hacking, recoloring, changing the whole appearance). Cloning is practically the first step to making any custom object. This is a basic rundown of cloning an object in Tmog.
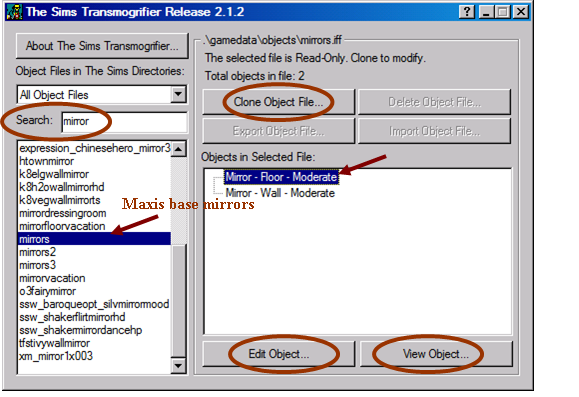
1. Open Tmog. This can take a while depending on the amount of your custom Sims 1 content. Say we want to clone a mirror. Search for “mirror” on the left column. Click the mirror you want to clone. We are going to clone the Maxis base floor mirror here (“mirrors”). Click and highlight the floor mirror on the right. Click clone.
1. Open Tmog. This can take a while depending on the amount of your custom Sims 1 content. Say we want to clone a mirror. Search for “mirror” on the left column. Click the mirror you want to clone. We are going to clone the Maxis base floor mirror here (“mirrors”). Click and highlight the floor mirror on the right. Click clone.
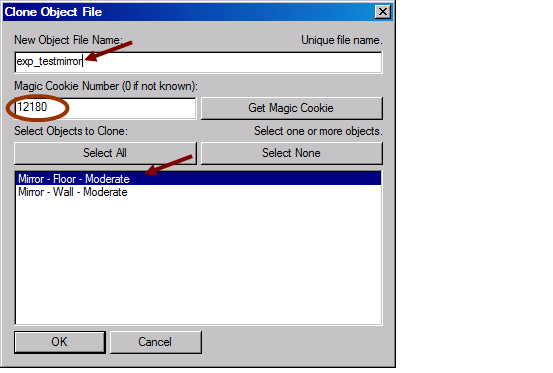
2. You should see a popup window:
3. Type in the name. Try to use a prefix that identifies you (I use “exp” for my objects), it makes it much easier to find and organize your growing list of creations down the road.
4. Type in your magic cookie. This is a 5-digit number that is unique to you and is hopefully not used by another creator – works kinda like a unique signature. This prevents GUID conflicts (2 objects sharing the exact same ID number) that can crash your game. GUID = globally unique ID number for each Sims object.
5. Click OK. The object will be cloned. If you need to access the cloned object file, it can be found under the "Maxis" > "The Sims" > "Downloads > "Transmogrified"
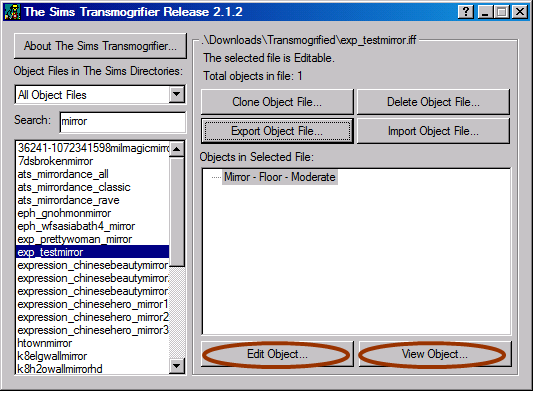
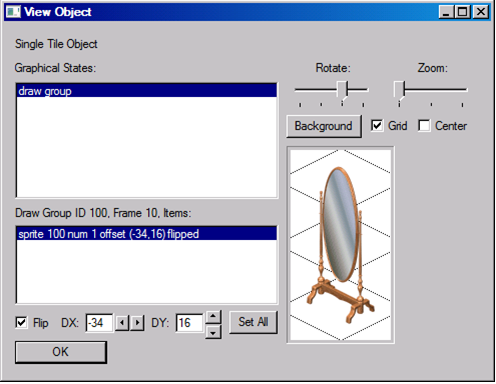
6. Click and select your new object (exp_testmirror in this case). You can click “View object” to see its graphics. You can see the different rotations and zooms.
4. Type in your magic cookie. This is a 5-digit number that is unique to you and is hopefully not used by another creator – works kinda like a unique signature. This prevents GUID conflicts (2 objects sharing the exact same ID number) that can crash your game. GUID = globally unique ID number for each Sims object.
- There is a magic cookie database for Sims 1 creators at https://groups.yahoo.com/neo/groups/magiccookie/info, register one that is not taken by another creator.
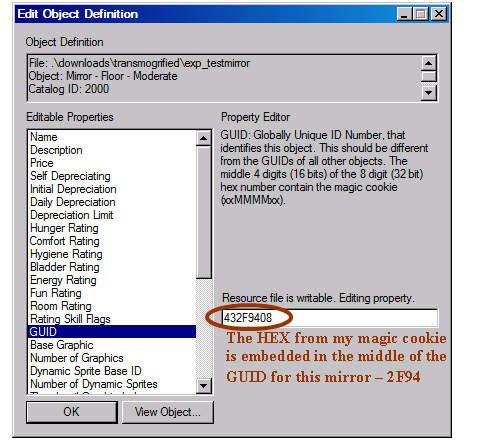
- My magic cookie number is 12180. This translates to HEX number 2F94. This HEX number will be embedded in the middle of the GUID of each of your cloned objects. You can find out your corresponding HEX with your computer calculator or an online convertor, or you can click edit object > edit definition > GUID in Tmog.
5. Click OK. The object will be cloned. If you need to access the cloned object file, it can be found under the "Maxis" > "The Sims" > "Downloads > "Transmogrified"
6. Click and select your new object (exp_testmirror in this case). You can click “View object” to see its graphics. You can see the different rotations and zooms.
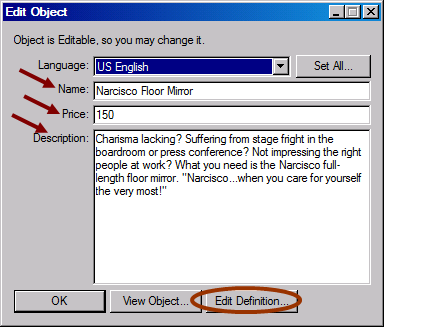
7. You can click Edit object to edit its name, price, and description. You can also click “edit description” for further details. Click "Set all" to make the same edit across all languages.
8. Now you want to export the graphics (sprites) of the
object so that you can alter its appearance with a graphics program. Go back to
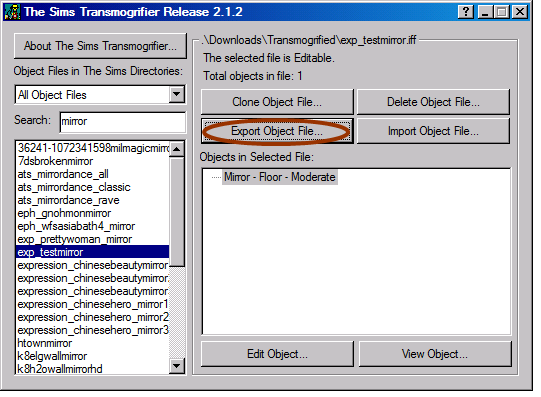
the main menu. Click and select the cloned object. Now click “export object
file”.
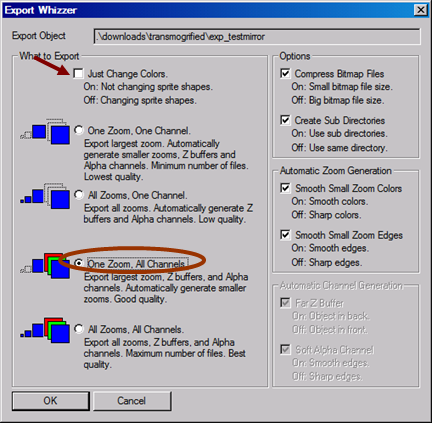
You will see a popout window. If you just want to recolor the object without changing its shape, check “just change colors”. If you want to change the shape, uncheck “just change colors” and select “one zoom, all channels”. This will export the a, z, and p sprites/channels/graphics for that particular object.
- P sprite has a yellow background: it shows what the object will look like in full color
- A channel has a black background: it controls the transparency of the object. The white parts are fully opaque, gray parts are semi transparent, and black parts are fully transparent (will not show in the game)
- Z buffer has a white background: it controls the perspective of the object. The darker parts are "closer" or "in front", while the lighter parts are "further" or "in the back"
Click OK and select a file destination for the exported sprites.
9. Always close Tmog before doing anything else with The Sims (if you leave Tmog open, it may clash with the game and other Sims-editing programs).
10. You probably want to change the graphics (sprites) of the cloned object with a graphics program (eg, Photoshop, GIMP, PAINT), then import them back into Tmog. This is not covered here.

